I have been using webcams to track Infra Red (IR) for 3 projects till now. I use Unibrain for the Multitouch table which gives upto 100 fps, but the problem with unibrain is that you need to have a Firewire 1394 (6 pin) port in your system. All macs have it by default. New laptops comes with 1394 (6 pin) port post these days. Any ways my bad luck, my lappi doesn have one. Thus I use this ismart webcam which I purchased in the local market (Ahmedabad, India) for Rs. 500 (~ $10) for testing and initial prototypes.
For my project, firstly I need my webcam to see the IR, thus I have to remove the IR filter which comes inbuilt with the webcam. In some webcams (Logitech Quick cam – old model) its a separate piece of glass which can be easily removed. In some webcams the IR filter will be embedded into the lens module. Thus you got to break it carefully and its a irreversible process. Secondly I don’t want my webcam to see any thing apart from the IR (i.e. visible spectrum). There are many ways to achieve this. Many have suggested using developed photo negative but believe me guys… I have tried it. it isn’t that accurate. If you are a professional and need perfect cut off of all the visible rays, you need to buy an IR bandpass filter specific to the wavelength of the IR you would like to see through. In my case I have a 850nm bandpass filter which I will be installing in the webcam. Thus in this tutorial I will be explaining,
1. How to remove the IR filter from a webcam (iSmart).
2. How to install a new IR bandpass filter.
This is how the webcam looks before dismantling.
Remove the lens by rotating it in anti clockwise direction till it comes out.
The arrow point area is the inner end of the lens facing towards the sensor. Here you can see a thin red coated glass plate (not visible in the pic as I have already broken it). break it with care using small screw driver or any pointed metal objects.
Now your webcam is ready to see IR. you can play around a little in this stage. Try seeing your veins in hands, your eyes etc.. its fun.
We will go to the next part of the tutorial, How to install an IR bandpass filter.
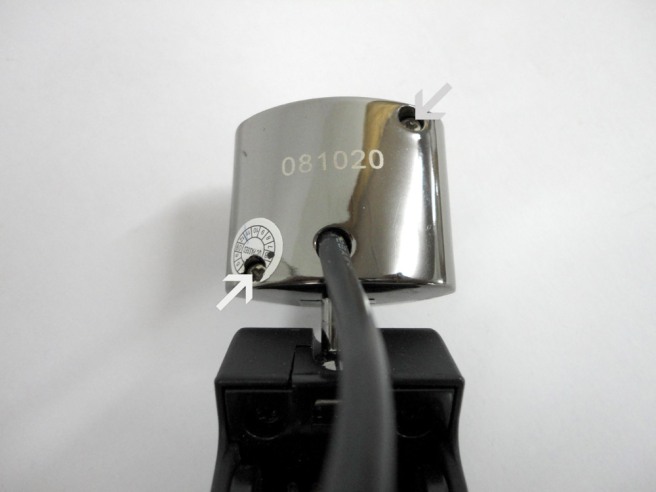
Turn the Webcam behind and remove the screws pointed in the picture.
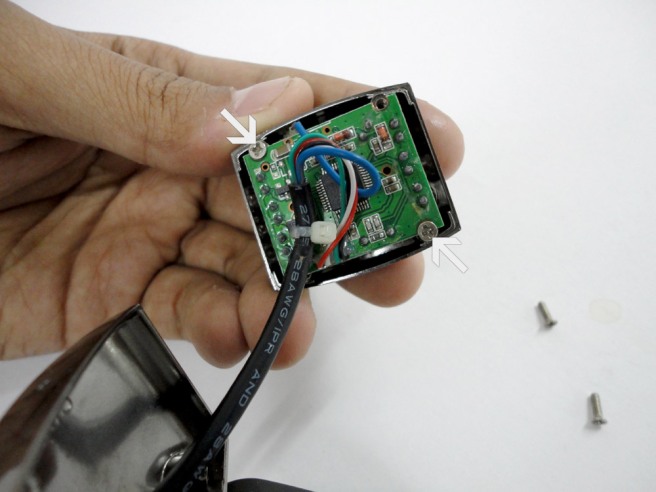
After opening the metallic covering, unscrew the other two screws pointed in the picture.
Your webcam’s front panel should look like this.
This is an IR bandpass filter (850nm) which exactly fits into the front panel lens mounting tunnel.
Fix it with any means (tape, glue, etc…). Make sure you dont leave any finger prints while fixing. The best way to do this is to have soft cotton cloths or tissues papers to wipe it clean before installing.
Now your webcam will only see IR. This can be used to track IR blobs. Possible applications are many. These are few of my projects where I have used this tracking. Interactive Multitouch Tables, ENHANCED and BLOC.
Best of luck guys.


Thank you for uploading, Can you please suggest a site to purchase IR band pass filter for 950nm pls…i want to use it for my project purpose…
what is the name of model
From where you have purchased that IR bandpass filter???
I like your work and and I am following your this post to turn my own webcam into an depth sensor. But I don’t know where to buy IR band pass filter here in India. Can you tell me a store here in India from where I can order it online.
Thanks a lot Sures Kumar… found it very helpful , just wanted to know from where did you buy this IR Bandpass Filter….???